Monday, 3 June 2013

Easy Nail Art!

Hey guys!

I woke up this morning with a strong desire to do my nails using stuff you could find around the house, stuff that most people would keep in their houses. I really wanted to do this as nail art tools can be hard to get your hands on and they can be quite expensive too. After looking around the house, I realised that the answer I had been looking for had been right in front f my eyes this whole time: ear buds!

I have been using these to clean up the edges around my nails ever since I started using nail polish (a long, long time ago). And I realised today that these are the perfect tools for nail art beginners. And another plus is that you can easily do your non dominant hand too!

All you need for this design are the following:
1. A white nail polish and a clear top coat
2. A few different coloured nail polishes
3. A sheet of paper
4. Ear buds


Step 1: Paint all your nails a solid white and allow to dry. You'll probably need to use two coats to get the polish to become opaque.
Step 2: Swipe your first colour onto the sheet of paper.
Step 3: Dip one side of the ear bud into the colour and dab it onto your nail.
Step 4: Repeat using two (or more if you want) colours.
Step 5: Use a clear top coat to blend the colours together. Do this while the coloured nail polish is still kind of wet.
Step 6: Repeat steps 2-5 on the rest of your nails

This is what I ended up with!


Again, the colours are brighter that appear in the picture. My pictures never show how bright the colours are :(
I personally think it's a cute design and I hope you guys do too!

Polishes I Used and Where to Find Them:
NYC - Pinstripe White (Available in Pennys)
NYC - Classy Glassy (Available in Pennys)
Barry M - Pink Flamingo (Available in Boots)
Barry M - Gelly Hi-Shine in Greenberry (Available in Boots)
Barry M - Cyan Blue (Available in Boots)
Barry M - Yellow (Available in Boots)
Barry M - Retro Blue (No longer available)
Collection - Go Retro! (Available in Boots)
Inglot - O2M in shade 663 and 664 (Available in Inglot)

Well that's it for today! Hope you like the design!

-M

Wednesday, 29 May 2013

Essence Nail Art Peel Off Base Coat

Hey everyone!

So I went into town today with my sister with the sole intention of tracking done the Essence polish I mentioned in yesterdays post. And happy days, I found it!

It comes in this little cardboard cover, which basically just has the instructions on it. These instructions are printed on the bottle itself too.


The first thing I did when I got home was try this out. I applied 1 coat, not too thick but not too thin either, and waited 10 minutes for it to dry, as instructed. When first applied, it was white. But as it dried, it became clear. 
 

I then applied 3 coats of my favourite glitter polish, which was probably why I ran into trouble with the removal. I had great fun peeling off the polish on my thumb and index finger, and the polish peeled easily. But the rest of them weren't as easy to remove.


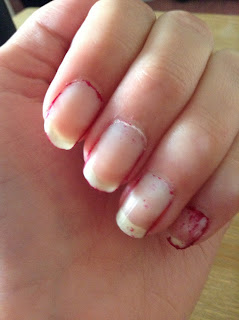
 As you can see, the polish on my little finger came off the worst. That's as much I could peel off. After about 5 minutes I gave up on that nail and cleaned up all my nails using the Bourjois Magic Nail Polish Remover, which worked surprisingly well with the glitter. That's probably just because I had already taken most of it off though.


This polish would probably (hopefully) have worked better if I had painted only one or two coats of the glitter polish. It did, however, cut down greatly on time, as as everyone knows, glitter polishes are horrendous to take off. It is well worth the buy, priced at €2.89. I've heard that it isn't stocked in many Pennys shops any more, but it was in both the O'Connell Street one and the Henry Street one. Not in Dundrum though.

In case you were wondering, the glitter polish I used is China Glaze 'Ruby Pumps'. I got it from my aunt in America last year. I've never seen any China Glaze polishes in Dublin, but you could probably get this on Amazon or eBay for a good enough price. 

- M


Tuesday, 28 May 2013

1st Post!

Welcome to my blog! Please excuse the cheesy name, it's all that I could think of that wasn't already taken!

I went to Dundrum today to pick up a few nail supplies that I'd had my eye on for the past couple of days. The things on my list were the Bourjois Paris Dissolvant Miracular, Essence Peel Off Base Coat and I also wanted to pick up a few Konad stamping supplies from McCabes.

Sadly, I only found one of these things: the Bourjois nail polish remover. The Essence polish wasn't in either Pennys or McCabes, which was unfortunate seeing as I've heard it's a great base coat for glitters and I have quite a few glitter polishes that I tend to avoid because of the nuisance that is removal.
I had checked the Konad website for stocklists and it said McCabes stocked their products, but I was told in store that they no longer do.

But there is a bright side to this! I decided to check out Inglot to see if they had any special offers on their O2M polishes and they did! They're currently offering 3for2 on all their polishes, including the breathable ones, which is something I've been wanting to try for quite a while. I picked up a lime green shade, an orange shade and a nude one.


 I used two coats of the orange polish. The first coat dried fairly quick and the second coat took about 15 minutes. The colour is a bit brighter than the picture shows. Its a fairly creamy bright orange, perfect for summer!

I used two coats of the green as well, but I think it needed a third coat to become really opaque. The drying time was the same. Again, this polish is brighter than the picture shows. It looks quite dull in the picture, but its actually not. Out of the three, this was my favourite. I've been looking for a polish in this colour for a long time and this is the only one I've found.

I used two coats of the nude polish too. I applied the second coat while the first was still slightly wet, but it actually dried faster than the other two. It's a nice enough shade, but you could probably get the exact same colour for a lot cheaper.

After painting on this colour, I decided to get creative and do a bit of nail art using all three colours. This is the video for the design I did (skip ahead to about 0:50):


It's a really simple design and so easy to do. I didn't have stripers, so I used tape to make the straight lines for the orange. The tape wasn't the best idea, so I ended up going freehand for the green. I used one coat of the orange and two coats of green. Here's my end result:

Ok, to be honest, I don't like the orange and green together in this design. It looks slightly weird to me. But that's just me. Tell me what you think of it in the comments!

Overall, these polishes aren't anything exceptional. The green colour is the only one I would recommend. With the other two, you could probably get similar shades for a lot cheaper. These polishes cost €13 each, and I got all three for €26 because of the 3for2 offer. They have some other shades that are worth checking out too.

Well, that's it for today! Thanks for checking out my blog

-M