Tuesday, 1 July 2014

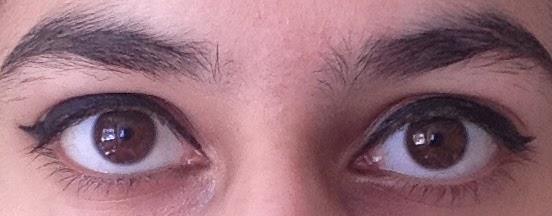
Maybelline Lasting Drama Black Shock Gel Liner Review

Hey everyone!

So the other day, as I was having a look in Boots to see what new goodies they had and what offers were on (as usual!), I stumbled on this new Maybelline eyeliner, the Lasting Drama Black Shock Gel Liner. I'd never seen it before, or heard of it either. Upon further inspection, I discovered that it was quite similar to Benefit's new 'They're Real! Push-Up Liner': it was a gel liner in a pen form with a tip that would seemingly make getting that perfect winged liner so much easier. To get the product onto the tip, you simply twist the bottom. I'd never used gel liner before, and I'd never done winged eye liner before either (apart from the occasional accidental flick created when using liquid eyeliner!). I'd forgotten my card at home that day, so I left Boots emptied handed, but determined to find out more about this eyeliner (too good to be true or perfect dupe?). I learned that the liner had been released last year, but only in Singapore. The reviews were mixed, with some absolutely loving it and others complaining about smudging. I guess they decided to quietly bring this into our market to rival Benefit's version., launching that same week.


Now, I've been wanting to try gel liner for a while now, and I thought this would be the perfect time to do so. So I picked this up the next day (along with another eyeliner from Maybelline since there was a special offer on!). I've been wearing this all day today, and I have to say I LOVE it!

It is really easy to apply, the colour is quite intense, it's long lasting and it doesn't smudge at all (not on my eyes anyway). I don't own the Benefit one (€25 is way too expensive for eye liner), so I can't quite tell you how it compares, but from what I've read/watched about the Benefit one, Maybelline's is very similar, but a good bit cheaper.


I think this is the perfect alternative for those who want to try something like Benefit's Push-Up liner, but don't want to pay a ridiculous amount for it. Maybelline Lasting Drama Black Shock Gel Liner is available in Boots for €13.49!

-M

Saturday, 7 June 2014

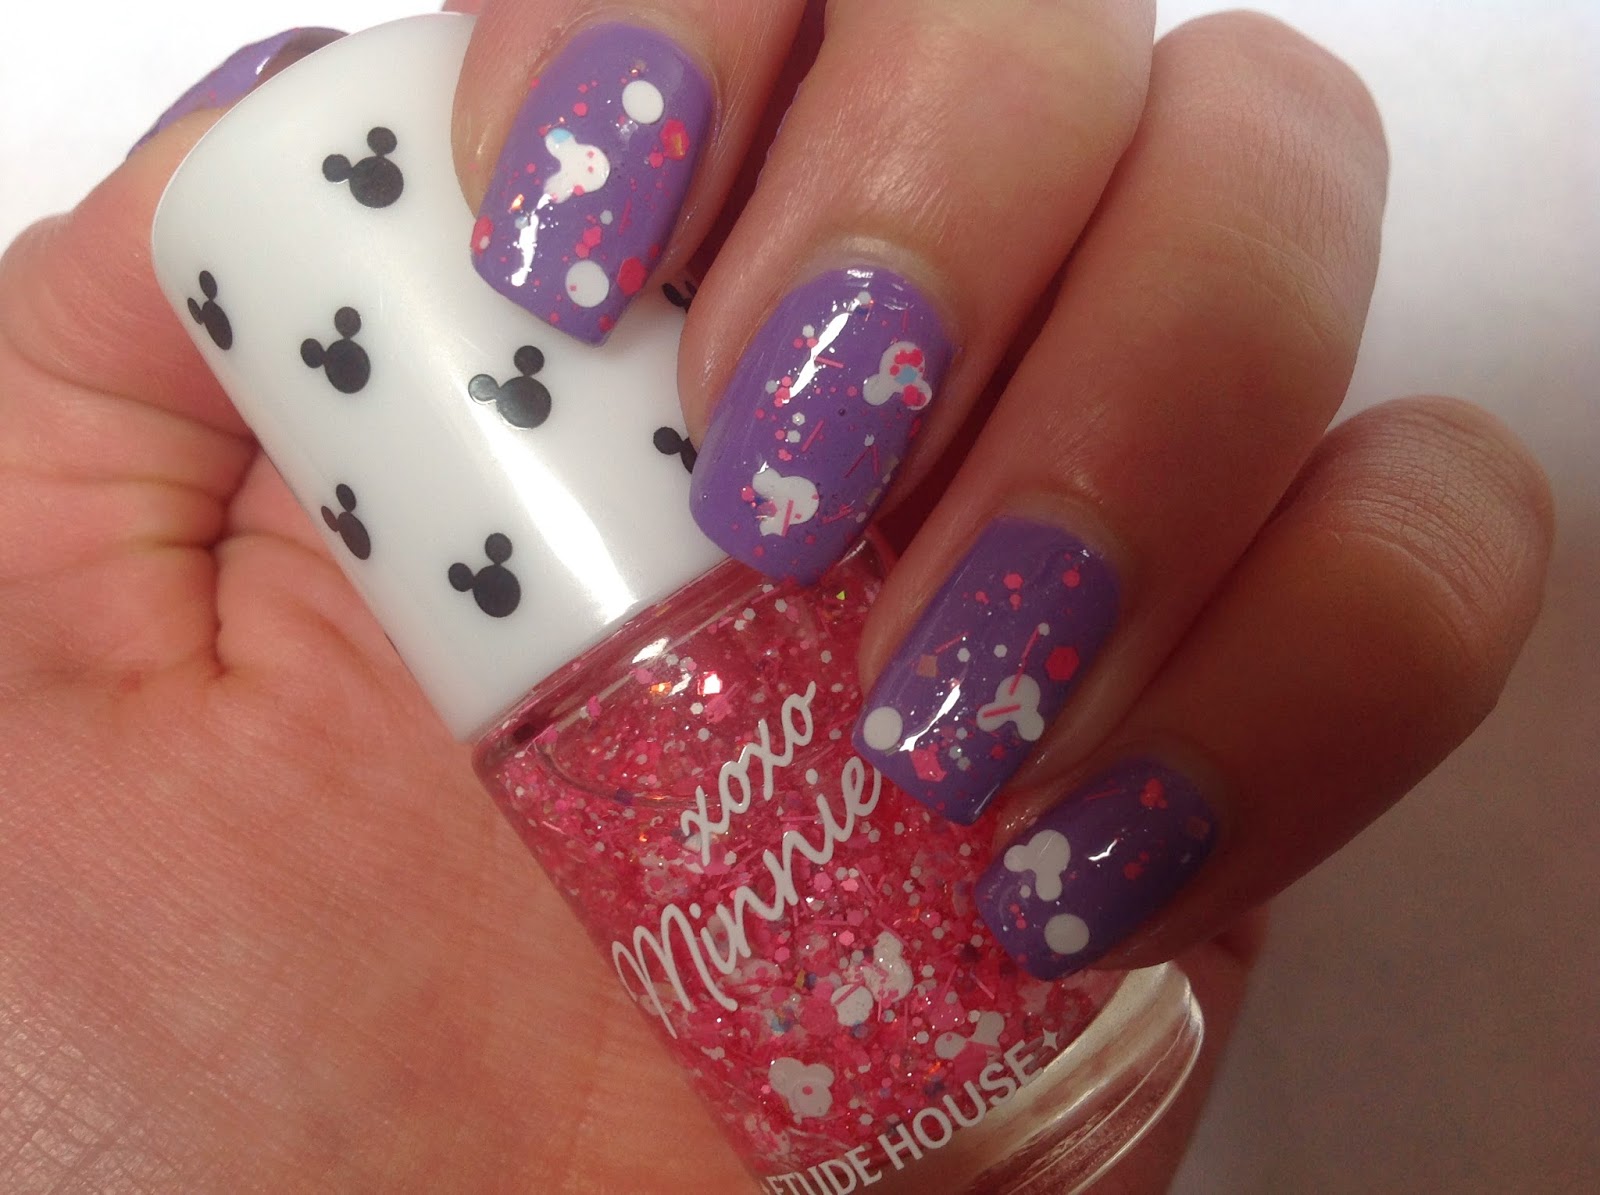
Etude House Minnie Mouse Collection Review and Swatches (Part 2)

Hey guys!

I have the other two glitter polishes from Etude House's Minnie Mouse Collection to show you today. There's not much to say about these other than what I've already said about the other two glitters in the collection (click here). I used both glitters over O.P.I.'s Do You Lilac It.

#3 Minnie White Face
Minnie White Face consists of white Minnie heads, white circular pieces, pink hexagon glitters, small pink bar glitters, and small pink, white and orangey-gold glitters. As before, the heads could be a bit difficult to get out of the bottle, but I found that tilting the bottle helped a lot.
Again, apply the glitters by dabbing them on and use top coat to smooth everything out and make the glitter stay on.

#4 Minnie Pink Ribbon
Minnie Pink Ribbon consisted of both pink and white bows, white circular pieces, light pink hexagons and small pink and orangey-gold glitters. Tilting the bottle helped here too, but it was a tiny bit more difficult to get them out, as compared to all the others.
Same as before, dab on the glitters and add a top coat.

Overall, I really did love this collection. I thought the glitters looked great, and I loved how affordable these were. Sure it was a bit difficult to get the main glitter pieces out, but I personally didn't mind too much. I got these on twofacemall.com for $5.50 each (about €4) (use discount code AFQRz1Gg to get 5% off all orders). You can also get them on eBay for a little bit less.

-M

Monday, 26 May 2014

Etude House Minnie Mouse Collection Review and Swatches (Part 1)

Hey guys!

Sorry I've been M.I.A for a while now. Since my last post, I was just swamped with college work and then exams crept up and before I knew it, it had been two months since I last posted anything. Since I'm on my summer holidays now, I'll (hopefully) be posting a lot more.

So, getting into today's post. A few months ago (again, sorry, this was meant to be up ages ago!), a bought some of the nail polishes from Etude House's Minnie Mouse Collection. In total, there are 6 polishes in the collection: two are just plain colours and the other four are Minnie Mouse themed glitters. I bought the four glitter ones, I didn't find the plain ones too exciting but the glitters looked amazing. I also bought another polish from Etude House (I'll probably write about it soon, but if you want to check it out now, I used it in my last nail art video) and the store I got them from also gave me a free polish.


So far, I've tried two out of the four Minnie glitters: #5 Minnie Silver Ribbon and #6 Minnie Black Face. 
#5 Minnie Silver Ribbon
Minnie Silver Ribbon consists of, as the name suggests, Minnie's signature bows in silver, along with some smaller lilac and white glitter particles, all suspended in a clear base. The bows were difficult to fish out at first, but once I got the hang of it it wasn't so bad. Annoying, but not awful, you need a bit of patience for these polishes. If you were going to buy this, I'd suggest you dab on the glitter pieces as opposed to applying like a regular polish. It takes a while to get the glitter on, so if you apply it normally, you'll be adding unnecessary layers of the clear polish, which will just make the whole thing end up looking like a mess.

#6 Minnie Black Face
Minnie Black Face consists of black 'Minnie' heads and smaller pieces of pink and white glitter. Now, I don't know about you, but to me these look a lot more like Mickey's head than Minnie's. This collection is supposed to be Minnie Mouse themed, but the head shaped glitters seem more Mickey than Minnie, and the design on the cap is also Mickey, not Minnie. I can understand for the glitters, since they did the bows in a separate polish, but the cap design should have included bows.
Moving past that and onto the polish itself, I can honestly say this was easier to apply than the last one. Maybe it was easier to get the pieces out, or maybe I just got better at it, either way I did manage to get more of the glitter onto the nail with this one. Same rule applied here: I dabbed the glitter and head pieces on as opposed to applying normally.

I used a topcoat on Minnie Silver Ribbon, but not Minnie Black Face. These polishes NEED a topcoat. The Silver Ribbon one lasted a good few days (can't remember exactly how many, but I took it off because I wanted to paint my nails a different colour, not because they'd started to chip away). The Black Face one didn't last nearly as long: just a few hours later, one of the black heads was missing, and I took the rest of it off when I got home.

Besides making the polish last a lot longer, you really need that layer of topcoat to even everything out. Since the glitter was dabbed on, it can look really patchy and weird, but a layer of topcoat really smooths things out.

If you're wondering where I got these, I got them off twofacemall.com and they were very cheap! They cost $5.50 each (about €4) and you can also find a few discount codes floating around the place. If you use my code (AFQRz1Gg), you can get 5% off all orders (used to be get a free polish, which is the pink on used under both of the glitters). You can also find some other discount codes on retailmenot.com

Overall, I do love the look of these polishes. They're very different to anything else I own, and I'm a huge Disney fan (aren't we all?), which just makes these even more exciting for me. They're also quite cheap, which is great (obviously). I'll be trying out the other two polishes I got from this collection soon, so keep your eyes peeled for that post.

-M

Tuesday, 18 March 2014

Inspired By...

Hey guys!

I've got a new nail art video, this time inspired by Orange Caramel's music video for their new song 'Catallena'. Check it out below!


Wednesday, 5 February 2014

Barry M Blueberry Ice Cream & Lady Swatches

Hey everyone!

I know this post is super late, I just kept forgetting about it. I had swatched these polishes ages ago but just never got around to writing up the post and putting up the pictures. But better late than never right? Right.

Blueberry Ice Cream
First up, Blueberry Ice Cream. I love this shade but to be honest, application was not easy. The polish was a bit to thick and slightly gloopy, making it really annoying to apply. But when I finally got it right, it looked great. I'm not sure if it's the formula or just the one I got, so if anyone else has this polish, I'd love to know how you got on with yours.
Lady
Lady is another one from their textured collection. I really liked this polish, the application was amazing, it dried so fast and the colour is so pretty too. Between Lady and Duchess though, I do personally prefer the colour of Duchess. I did a short review on Duchess here if you want to check it out!

-M

Thursday, 16 January 2014

Barry M Indigo & Duchess Swatches!

Hey everyone!

Today I've got two more Barry M swatches to share with you, Indigo and Duchess. I got both of these on my trip to the UK a few weeks ago, along with a few others.

Indigo
Indigo is hands down one of my favourite Barry M polishes ever. The colour is gorgeous, it has a great shine to it (I didn't have to use a top coat!), it's opaque in two coats and the application is great! 

Duchess
Duchess is from the textured glitter collection that Barry M released a few months ago. I'm not a huge fan of textured polishes, but since it was on sale in Superdrug, I decided to pick it up, along with another of the textured polishes from the range. I definitely wasn't disappointed! I absolutely loved this polish, the colour is beautiful, the application is amazing and I actually sort of liked the texture too. The only downfall was, as with all glitters, the removal. I applied a peel off base coat underneath to try and make it easier, but it didn't peel very well. I think it might be because I used two coats as opposed to one. I then gave my nails a light scrub with some polish remover and started to peel off the base coat then, which worked surprisingly well.


Do anyone of you have either of these polishes? Which of the two colours did you prefer? 
-M

Sunday, 5 January 2014

New Barry M Polishes!

Hey everyone!

I've been wanting to post for a while, but since the last time I posted, I've been really busy. Between college assignments and then exams, I never got around to updating, even though I had new polishes I wanted to show off. With all that out of the way now, I finally have time to swatch and show you all my lovely new polishes!

Straight after exams, I went to visit family in England, and whenever I go to the UK I hit up the Barry M stands in Boots and Superdrug, the polishes being so much cheaper there. This trip was no exception: I picked up 7 polishes, two nail art pens and the second Wah Nails book! I got the first book from a friend for Christmas and just needed to get the second one too, they designs are amazing in both!


The Barry M polishes I picked up were Indigo, Berry Cosmo, Blueberry Ice Cream, Duchess, Lady and two limited edition glitters that I got for free with my purchases from Superdrug.


So far, I've only tried the Berry Cosmo, and to be honest I'm on the fence with this one. I love how it looks under direct sunlight, but I'm not crazy about the way it looks normally. I think it might just be because I love bright colours and this is a bit too dark for my taste. I only used one coat in the photos below:
No flash

With Flash
Another thing worth mentioning is that it doesn't last very long, mine started chipping the next day. They were very small chips, near the tip of the nails, but they still really irked me. I think it would be fine with a top coat though.

Well that's it for today! Stay tuned for the rest of the swatches, coming soon! I hope you all enjoyed the holidays!
-M